
“Flume 데이터 수집” 을 어떻게 하는지 실습 내용을 간단히 정리해보았습니다.
본 내용은 KMOOC에서 김윤기 – 빅데이터 프레임워크 강의를 정리한 내용 입니다.
환경 구성
우선 아래 명령어를 통해 도커 이미지를 다운 받고 실행 합니다.
해당 파일은 ‘flume 데이터 수집’을 진행할 수 있도록 환경을 갖춘 이미지 입니다.
docker run \
  --env FLUME_AGENT_NAME=docker \
  --volume /tmp/config.conf:/opt/flume-config/flume.conf \
  --detach \
  ykkim77/flume-cuk:latest
도커 이미지가 제대로 받아졌는지 확인 합니다.
docker images제대로 다운이 완료되었다면 이미지가 생성된 것을 확인 할 수 있습니다.

docker run을 했으므로 컨테이너가 실행되고 있을 것 입니다. 컨테이너를 확인해봅니다.
docker ps
생성된 컨테이너로 접속합니다.
docker exec -it [container id] /bin/bashdocker exec -it 4fd2656094e2 /bin/bashFlume 데이터 수집
디렉토리의 파일을 소스로 데이터 수집하기
1. 우분투의 /opt/flume/conf 에서 flume-conf.properties 를 아래와 같이 작성합니다.
flume-conf.properties를 엽니다.
vi flume-conf.propertiesvi 편집기를 연 상태에서 영문자 a를 눌러주면 편집모드로 되고, esc 를 누르면 다시 읽기 모드로 전환됩니다.
#source, sink, channel 의 이름 설정

agent1.sources = source_1
agent1.sinks = sink_1
agent1.channels = channel_1

# source와 sink는 채널과 연결되어야 하는데, 이때 어떤 source와 sink가 어떤 채널에 연결될지 지정해 준다.

agent1.sources.source_1.channels = channel_1
agent1.sinks.sink_1.channel = channel_1


agent1.sources.source_1.type = spooldir  # source type을 디렉토리로 설정한다.
agent1.sources.source_1.spoolDir = /home/cuk_practice/test  # source 디렉토리 경로를 설정한다.

agent1.sinks.sink_1.type = logger # sink_type을 로그로 설정한다.

agent1.channels.channel_1.type = file
esc를 눌러 읽기 모드로 전환한 뒤, :wq 또는 :q! 명령어를 눌러주고 편집기를 빠져나옵니다.
NOTE. Channel type (file vs memory)
싱크에서 이벤트를 가져올 때까지 이벤트를 임시로 저장합니다. Flume은 다양한 유형의 채널을 지원하며 가장 일반적인 채널은 ‘메모리’와 ‘파일’입니다. 둘 사이의 주요 차이점은 다음과 같습니다.
memory channel
- 이벤트를 메모리에 저장합니다.
- 빠른 이벤트 전송을 제공하므로 처리량이 많은 애플리케이션에 적합합니다.
- Flume 에이전트가 충돌하거나 다시 시작되면 이벤트가 손실되므로 파일 기반 채널보다 안정성이 낮습니다.
file channel
- 이벤트를 디스크에 저장합니다.
- 디스크 I/O 작업으로 인해 메모리 채널에 비해 느리지만 여전히 효율적입니다.
- 이벤트가 디스크에 유지되므로 안정성이 높아 에이전트 오류 또는 재시작 시 데이터 손실을 방지합니다.
2. 파일 데이터가 수집 될 디렉토리를 만듭니다.
mkdir -p /home/flume_practice/test3. /opt/flume/conf 디렉토리 상에서 다음 명령어를 입력하여 flume으로 데이터 수집을 수행합니다.
flume-ng agent -n agent1 -c /opt/flume/conf -f flume-conf.properties -Dflume.root.logger=INFO,console이 명령어는 agent1이라는 이름의 Flume 에이전트를 /opt/flume/conf 디렉토리에 있는 flume-conf.properties 파일의 설정에 따라 실행하며, 로그를 INFO 레벨로 콘솔에 출력하도록 설정합니다.
flume-ng agent
- Flume 에이전트를 실행하라는 명령입니다.
flume-ng는 Flume의 다음 세대(next-generation) 실행 도구를 의미합니다.
-n agent1
- 에이전트의 이름을
agent1로 지정합니다. 이 이름은 설정 파일에서 정의된 에이전트 이름과 일치해야 합니다.
-c /opt/flume/conf
- Flume 설정 파일들이 위치한 디렉토리를 지정합니다. 이 경우,
/opt/flume/conf디렉토리에서 설정 파일을 찾습니다.
-f flume-conf.properties
- 에이전트의 설정을 정의한 주요 설정 파일을 지정합니다. 여기서는
flume-conf.properties파일이 설정 파일입니다.
-Dflume.root.logger=INFO,console
- Flume의 로그 설정을 지정합니다.
INFO는 로그 레벨을 나타냅니다.INFO레벨은 정보 메시지를 포함한 모든 상위 레벨 로그(경고, 오류)를 출력합니다.console은 로그 출력을 콘솔로 지정합니다. 이는 로그 메시지가 터미널에 출력됨을 의미합니다.
4. 새로운 탭으로 우분투를 실행 한 뒤, flume 컨테이너를 실행 합니다. 그리고 해당 컨테이너에서 /home/flume_practice/test 상에서 파일을 생성해 보겠습니다.
touch test.txt5. logger 방식으로 실시간으로 생성된 파일의 내용을 수집된 것을 console로 확인가능 합니다.

특정 포트로 메시지 보내기
1. 우분투의 /opt/flume/conf 에서 flume-conf2.properties 를 아래와 같이 작성합니다.
- source type이 이전에는 spooldir 이였지만 지금은 netcat 임을 주목해주세요.
#source, sink, channel 의 이름 설정
agent1.sources = s1
agent1.sinks = k1
agent1.channels = c1

# source와 sink는 채널과 연결되어야 하는데, 이때 어떤 source와 sink가 어떤 채널에 연결될지 지정해 준다.

agent1.sources.s1.channels = c1
agent1.sinks.k1.channel = c1

agent1.sources.s1.type = netcat  # source type을 네트워크 메시지로 한다.
agent1.sources.s1.bind = localhost  # 이때 소스의 아이피를 설정
agent1.sources.s1.port = 12345      # 소스의 포트를 설정

agent1.sinks.k1.type = logger     #sink_type을 로그로 설정한다

agent1.channels.c1.type = memory
3. /opt/flume/conf 디렉토리상에서 다음 명령어를 입력하여 flume으로 데이터 수집을 수행합니다.
flume-ng agent -n agent1 -c /opt/flume/conf -f flume-conf2.properties -Dflume.root.logger=INFO,console4. 다른 우분투 탭을 실행하여 아래와 같이 telnet으로 12345 번 포트에 메시지를 송신합니다
telnet localhost 12345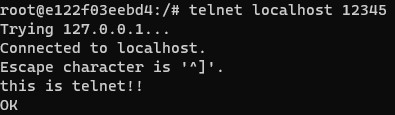
5. flume agent 쪽에서 telnet으로 보낸 메세지를 수집했는지 확인합니다

멀티 Agent 만들기
Agent1 에서 Agent2로 데이터를 전달하는 멀티 Agent를 만들어 보겠습니다. 아래 그림을 확인해주세요.
Agent1에서 시스템의 로그를 읽은 뒤 Agent2로 전달하는 flow 입니다.

agent1 만들기
1. 우분투의 /opt/flume/conf 에서 flume-conf3-1.properties 를 작성합니다.
source type은 exec이고 command는 tail -f /var/log/alternatives.log 입니다.
- 이 소스는 tail -f /var/log/alternatives.log 명령을 실행하여 /var/log/alternatives.log 파일에 추가된 새 줄을 계속해서 읽습니다.
- /var/log/alternatives.log 로그파일은 update-alternatives system에 관련된 로그가 저장되는 파일이라고 합니다.
아래 설정에서 Sink는 localhost:10000을 수신하는 Avro 소스에 이벤트를 보냅니다.
agent1.sources = s1
agent1.sinks = k1
agent1.channels = c1

agent1.sources.s1.channels = c1
agent1.sinks.k1.channel = c1

agent1.sources.s1.type = exec
agent1.sources.s1.command = tail -f /var/log/alternatives.log


agent1.sinks.k1.type = avro
agent1.sinks.k1.hostname = localhost
agent1.sinks.k1.port = 10000

agent1.channels.c1.type = memory
agent1.channels.c1.capacity = 1000
agent2 만들기
2. 우분투의 /opt/flume/conf 에서 flume-conf3-2.properties 를 작성합니다.
- source type이 avro이고 localhost:10000에 bind 해준 것에 유의합니다.
agent2.sources = s2
agent2.sinks = k2
agent2.channels = c2

agent2.sources.s2.channels = c2
agent2.sinks.k2.channel = c2

agent2.sources.s2.type = avro
agent2.sources.s2.bind = localhost
agent2.sources.s2.port = 10000


agent2.sinks.k2.type = logger


agent2.channels.c2.type = memory
agent2.channels.c2.capacity = 1000
3. agent2 부터 먼저 수행합니다.
flume-ng agent -n agent2 -c /opt/flume/conf -f flume-conf3-2.properties -Dflume.root.logger=INFO,console4. agent1을 수행해줍니다.
flume-ng agent -n agent1 -c /opt/flume/conf -f flume-conf3-1.properties -Dflume.root.logger=INFO,console5. agent2의 console을 확인해 봅니다.
